One key thing every elearning design should have is an easy-to-follow player. Therefore, your choice of elearning tool should let you customize these settings. Customizing player settings gives you the power to enhance the user interface. Luckily, Articulate Storyline2 has a very easy setup for you to do just that. Changes can be made to remove all navigation features or leave just the ones you need. Colors and labels can also be modified to meet the needs of your project. Let’s take a quick look at these settings of Storyline2(SL2).
The Default
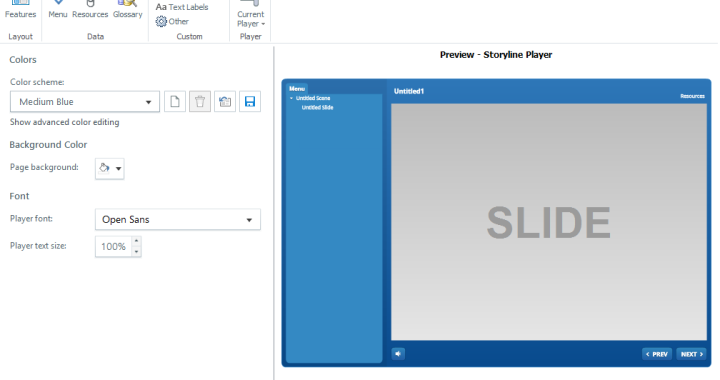
By default, SL2 has a very neutral c-shaped elearning interface allowing the user to navigate sequentially with Previous and Next buttons. It also has the left hand side Menu to jump slides. Watch the video below for a quick intro on the settings and how to change them.
Customizing Player Settings
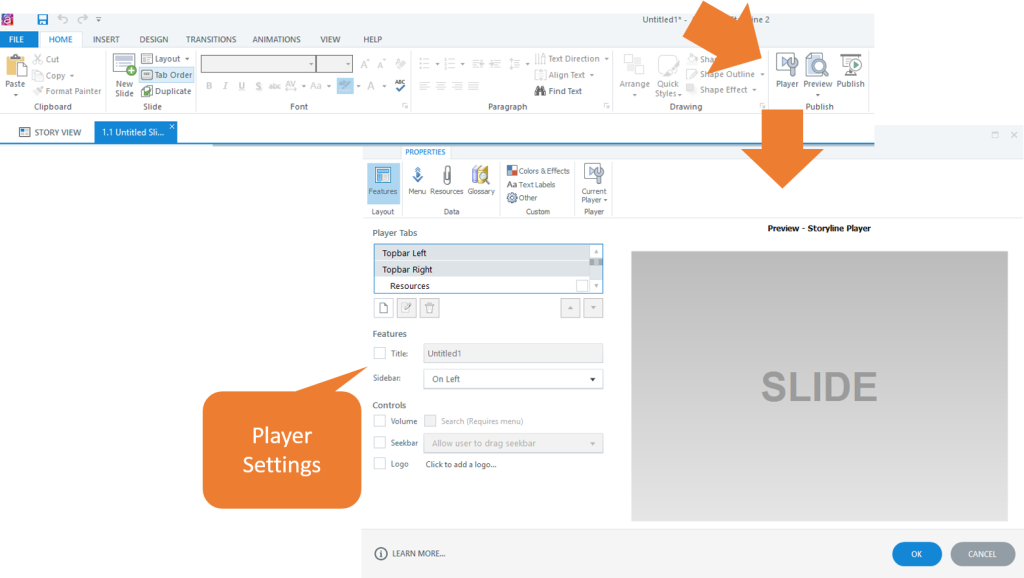
Customizing player settings is easy in SL2. Just click on the Player icon to open its settings. Once there you can change the color, look and feel of its features. All menu selections and features can be modified and previewed without leaving the settings display.

Saving Presets
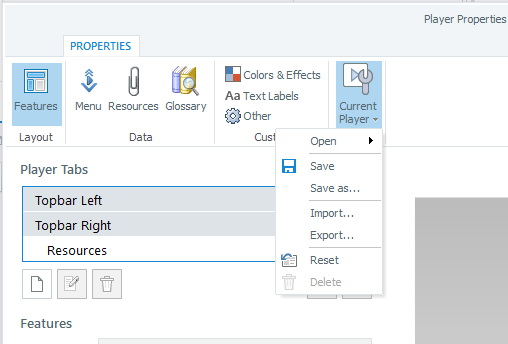
By clicking on the drop-down for Current Player you can save the modifications made and import them into any other project. This is a great feature to quickly format the player in other projects without having to spend any time customizing individual components.

Conclusion
In summary, player customization in elearning modules is a best practice to engage learners. On the embedded video shown, I discuss how to modify settings in SL2. Changes can be previewed as they are made which is a great feature to explore various options. Those options can then be saved as part of a template or by importing them to projects. A great resource to change these settings is available in the Elearning Heroes Community if you search under “player colors” as I described on the video.

