HTML5 or Hypertext Markup Language version 5 is the current language of the web. HTML is the language that defines the structure of a web page by using tags. Every webpage in the world has HTML, the code is really easy to learn. If you are a learning professional today; then you should really consider becoming fluent in the language of the web. Whether you are a facilitator or instructional designer, HTML has qualities that would further your ability to present content to your audience across devices and platforms. In this part 2 of 4 for the 3 Web languages every learning professional should speak series, we take a nice little dive into HTML and even get you to write your first web page.
HTML5 is Free and Responsive
HTML5 can be authored with any text editor like Notepad for Windows or TextEdit in Macs. As you probably know, these editors are free or included with your respective operating system. When you write HTML with a text editor, you create web pages by saving your code as an .HTML or .HTM file. Always make sure you remember to do this for otherwise the file will be saved in its default format which should be .TXT or text file. A text file would just open in its default program and show you the code, while a web page is opened by your default web browser. HTML5 is also responsive. The term "responsive" refers to the web page's ability to resize automatically to match the screen size of any device. For example; this website is fully responsive and the article gets rearranged to fulfill the size requirements of your smartphone, tablet or desktop.


My first HTML5 page
Here's your opportunity to gain a new skill and start learning HTML5. The following steps will guide you to create your first website and the only requirement I have is to please share this article with anyone you know on social media and else. Ready? Here we go!
STEP 1 Create a folder
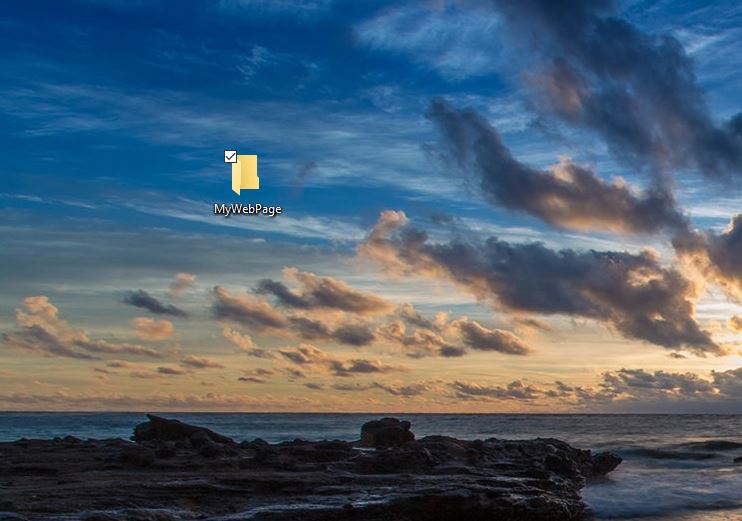
Create a folder on your PC's desktop and name it "MyWebPage". We are doing this because the folder serves as a website. Yes, you read accurately, web pages can only contain text or in this case, hypertext markup. We create a folder so we can hold an image or media asset we want to display on our web page. Therefore, the folder represents our website, the place where all our web pages and their assets reside.

Step 2 Open your text editor
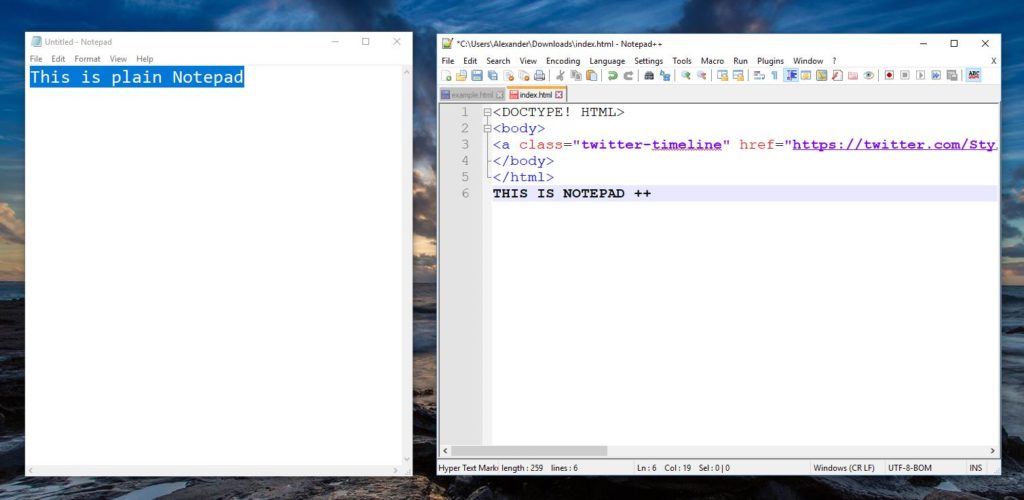
As previously mentioned, we need a text editor to make our web page for free. In my case, I'll be using Notepad on Windows. However, I recommend finding and installing a free tool like Notepad ++ which has far more capabilities conducive to web design coding. Similar tools offer proof-reading in the language specified which makes your life easier when things don't work or there's a misspelling in your code.

Step 3 Declare your language
One thing to remember regarding web languages is that we are not only writing for users but, also for web browsers. Each popular web browser such as Google Chrome, Microsoft Edge or Explorer and Apple's Safari reads HTML but, each has its own way and requirements to render your page as it was intended to. Therefore, regardless of language, the first thing on your web page is the declaration of the language and in some cases the version involved. In this first step, type the following:
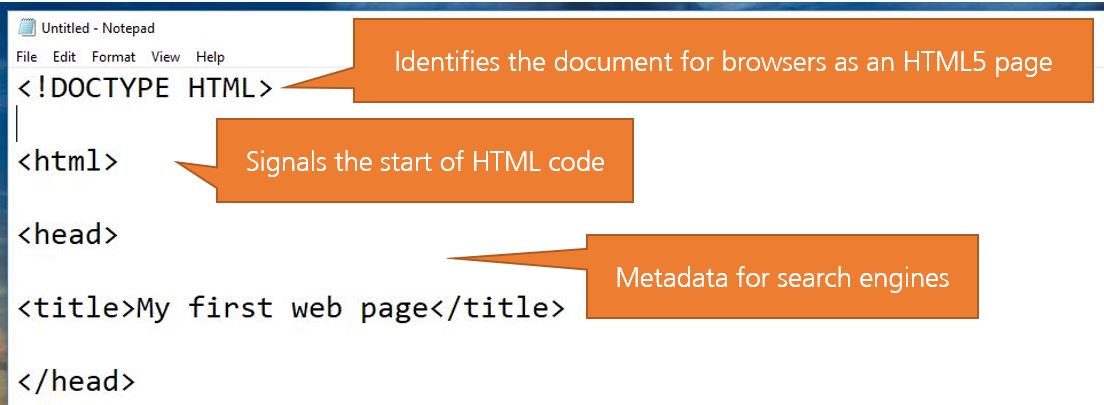
<!DOCTYPE HTML>
This tag lets the browser know that your web page is meant to be read as an HTML5 page.
Step4 Set the structure
Hit the ENTER\RETURN key and type the following below the <!DOCTYPE HTML> tag:
<html>
<head>
<title>My first web page</title>
</head>
<body>
<p> Hi, this is my first web page!</p>
</body>
</html>
The code above constitutes your first web page. The <html> </html> tags let web browsers know the starting and endpoints to expect HTML code. The <head></head> tags is for content not displayed on the page but rather identifying metadata for users on web searches. The <title></title> tags display the title of the page on the web browsers tab. Finally, the <body></body> tags identify the starting and endpoints for all visible web content on the page.


Step 5 Save as a web page
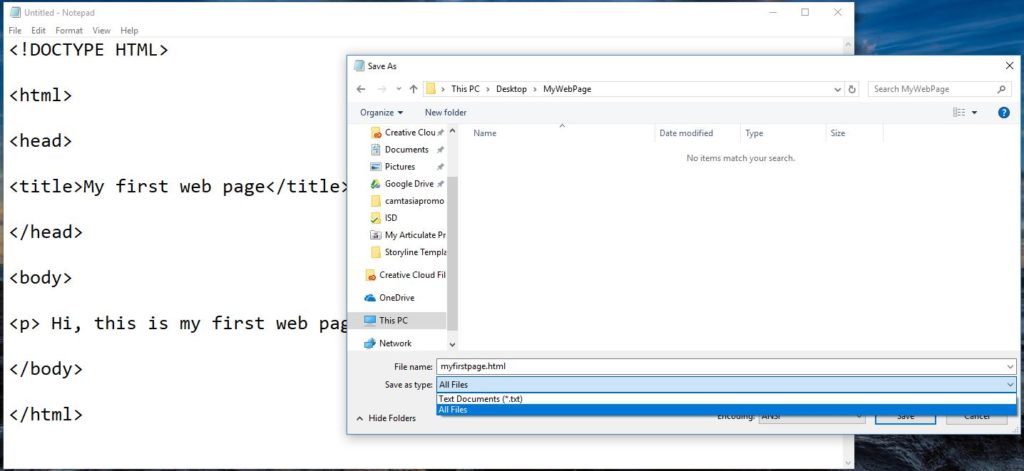
Yay! You have written your first web page. Before you go view it, click File>Save as>change the "Save as type" format to "All Files" and name your file "myfirstpage.html". Please make sure you save the file in the folder created in Step 1. This will be important in the future as we will add more elements.

Step 6 View your work!
If you saved your file as a web page, it should display the icon of your default web browser in the "MyWebPage" folder. In this final step, simply open the file and it should open directly on your web browser.
If it does not, please review all the steps to ensure you have followed them accurately.

Next steps
Congratulations! You have built your first web page. It's not much in terms of awesome design but, don't worry there are many ways to make it look amazing. For that, you will have to learn our topic of next week and Part 3 of the series: Cascading Style Sheets or CSS. If you can't wait until then, go ahead to W3 Schools and follow the tutorials there. Otherwise, try to edit your web page by adding <h1></h1> tags above the current <p></p> tags. Anything, you type within will be displayed with a large heading style format. Thank you for reading and keep learning!

