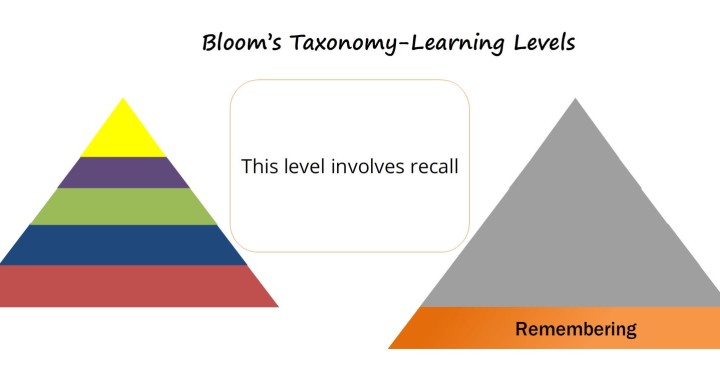
One key advantage of Articulate’s Storyline2(SL2) is the ability to control interactions from a slide master. This makes changes and updates a painless and automated approach which would save you a ton of hours. Slide masters are usually helpful to standardize design elements such as fonts, image placement, formatting, backgrounds, etc. They are essential for any presentation design and save you time by replicating their formatting standards to any new slide added to your elearning project. However, by using layers within the master you can embed interaction elements like buttons, drag n’ drop shapes or sliders without having to recreate them again. This post tells you how to achieve this and offers you links to download two Stylelearn projects that use this approach.
The Workflow
The workflow process to embed interactions in slide masters is very simple in SL2. These are the steps: We access the master, specify a layout, insert a layer and add triggers so the layer is shown at the start of the timeline.
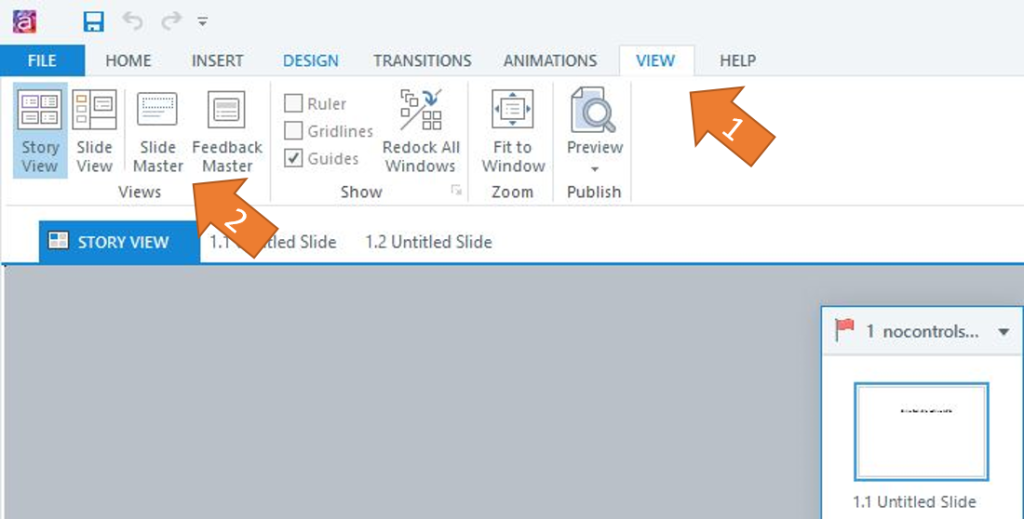
1. Access the Slide Master
To access the master, click on VIEW>SLIDE MASTER
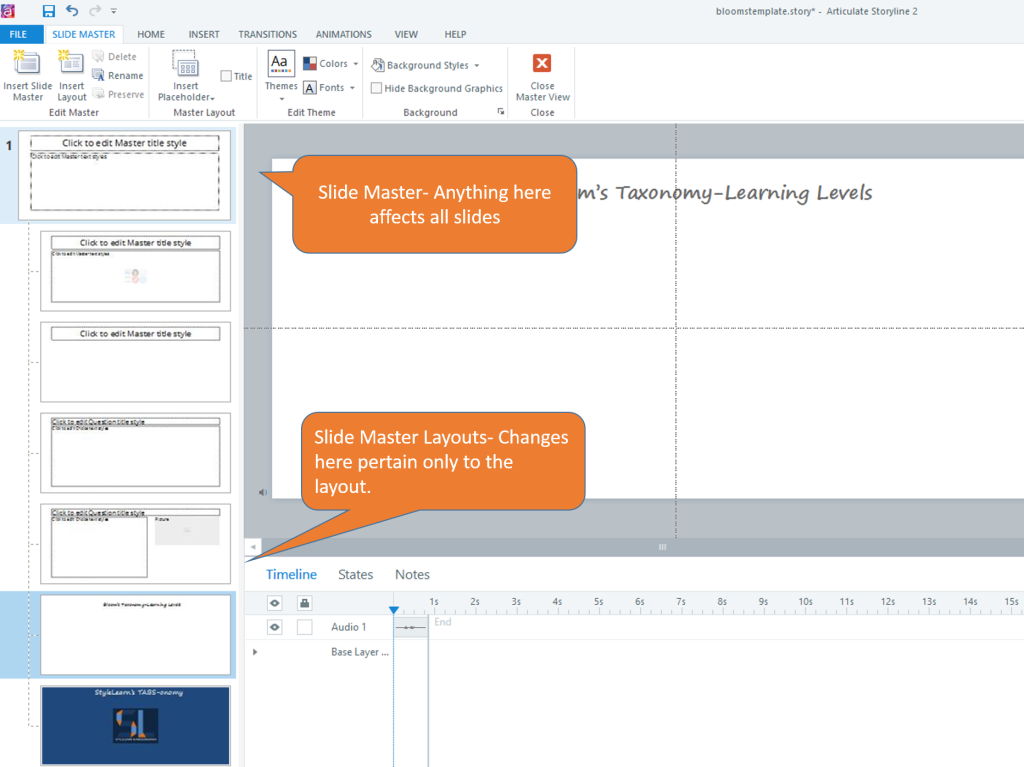
2. Specify a Layout or Apply to All
Once there, you will see the Master (top slide in the grouping). Any edits to it will affect all other layouts below. Changes made to a single slide layout would only affect the layout in question.
3. Add Layers and Triggers
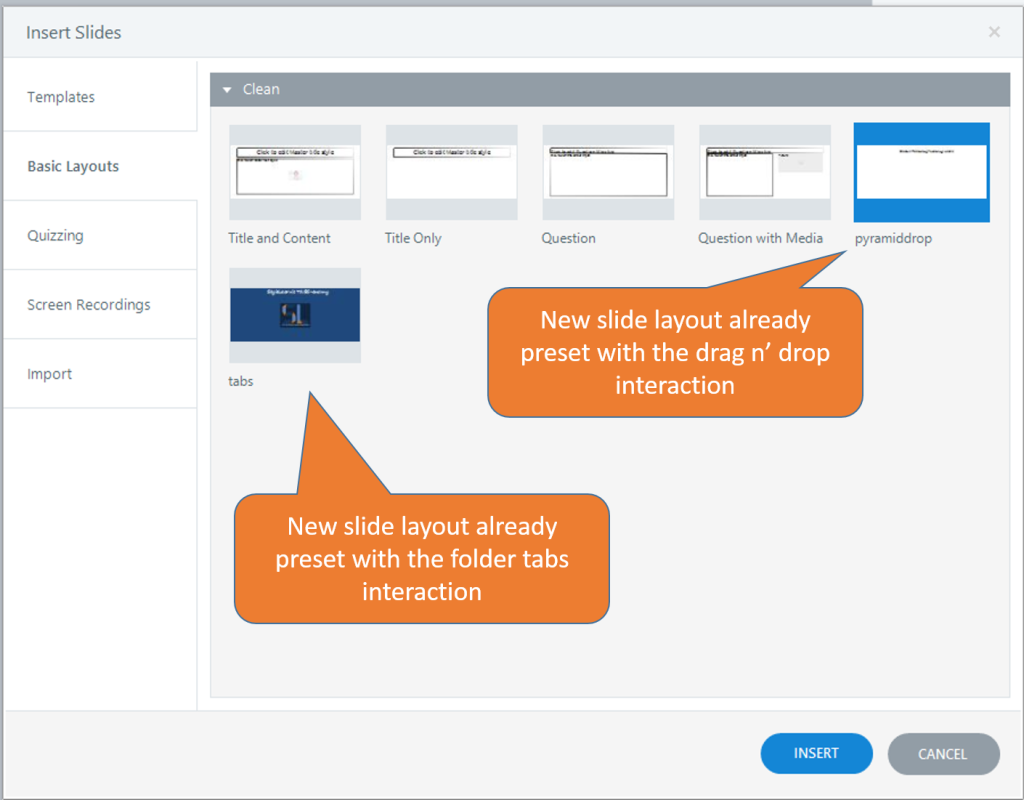
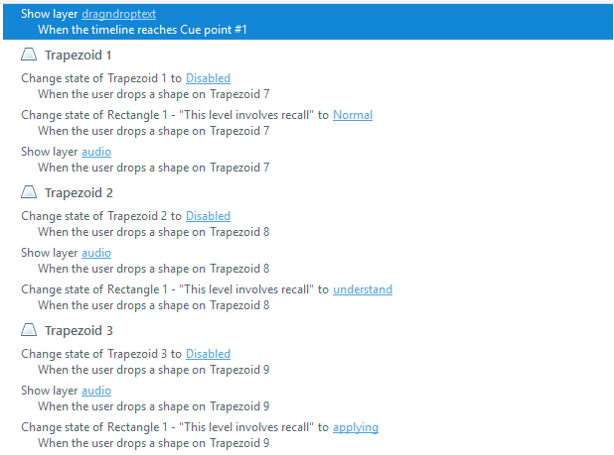
This is the most important step in embedding interactions in the slide master. The sample below is about Bloom’s Taxonomy which is a great tool for instructional design when addressing learning objectives and targeting the various learning levels as described by Benjamin Bloom (1913-1999). A layer named “pyramid” was created to add a drag n’ drop interaction where the user would drag each level of the pyramid into a drop zone to reveal the level’s name and description. What’s the advantage of embedding the interaction? The interaction is now available as a default layout for any new slide added using its layout. Therefore, the interaction can be repeated and inserted in any part of the project.
Triggers
With triggers we establish the commands that SL2 will follow to evoke an action. In this case, we want a trigger that will show the layer with interactions at the start of the timeline.
4. View the Sample and Download the File
Below you can see how the sample works and if you follow this link you can download the .story file from the ELH Community for FREE ; )

