Time is the only commodity we can’t buy, we can only use it or it’s gone. When I’m not defeating elearning evil (that is, preventing ineffective and\or boring learning from happening) I usually develop learning solutions for call center personnel. So, what’s so relevant about that? Well, call center professionals have everything “timed” on their schedules. Therefore, using time controls to manage or measure how long a user would take to move to the next slide in an elearning course can be very useful for call center environments and learning analytics nonetheless. In this post, I show you a couple of strategies for using timers, how to build an easy one and a couple of creative approaches I’ve learnt from cool elearning developers like Michael Hinze.
Why Timers?
Timers are not just nice features to show how cool you can make a course look. In its raw definition, a timer is a measuring tool. You either count up or down; it’s your choice. However, some of the elearning strategies involved using timers focus on time control per slide and measuring user behavior.
Timed Quiz
There are a few reasons why you would have a timer on a quiz. In the sample below, I use a countdown timer allowing the user 20 seconds to answer each question. If the timer runs out, the question is marked wrong. From the user’s perspective, the timer is a motivator reminding him or her to focus on the question to beat the timer. From a developer’s point of view, it provides a more accurate way to calculate time per slide viewed. In call center environments, this is a big factor as you can’t really take more than 20 to 30 minutes of production schedule for training courses.
Timed Interactions
Another great use of timers for elearning is a count up timer that would start counting on each slide to provide a measure of the learner’s behavior on the slide in question. You can then assign a variable (think of this as a “container” for a numeric value in seconds) to each slide and capture those results. For example; if you have a diverse target audience is there a difference in response times between one user to the next? The timer value might help you correlate the difficulty of the onscreen task with the time spent on it by the user.
A Basic Timer in Articulate Storyline
Even though this post is about Storyline2 (SL2), the timeline timer is the most basic approach for creating the timing illusion on screen in both Articulate Storyline (SL1) and Storyline2. Although the images seen are SL2 based, you can recreate the steps on (SL1).
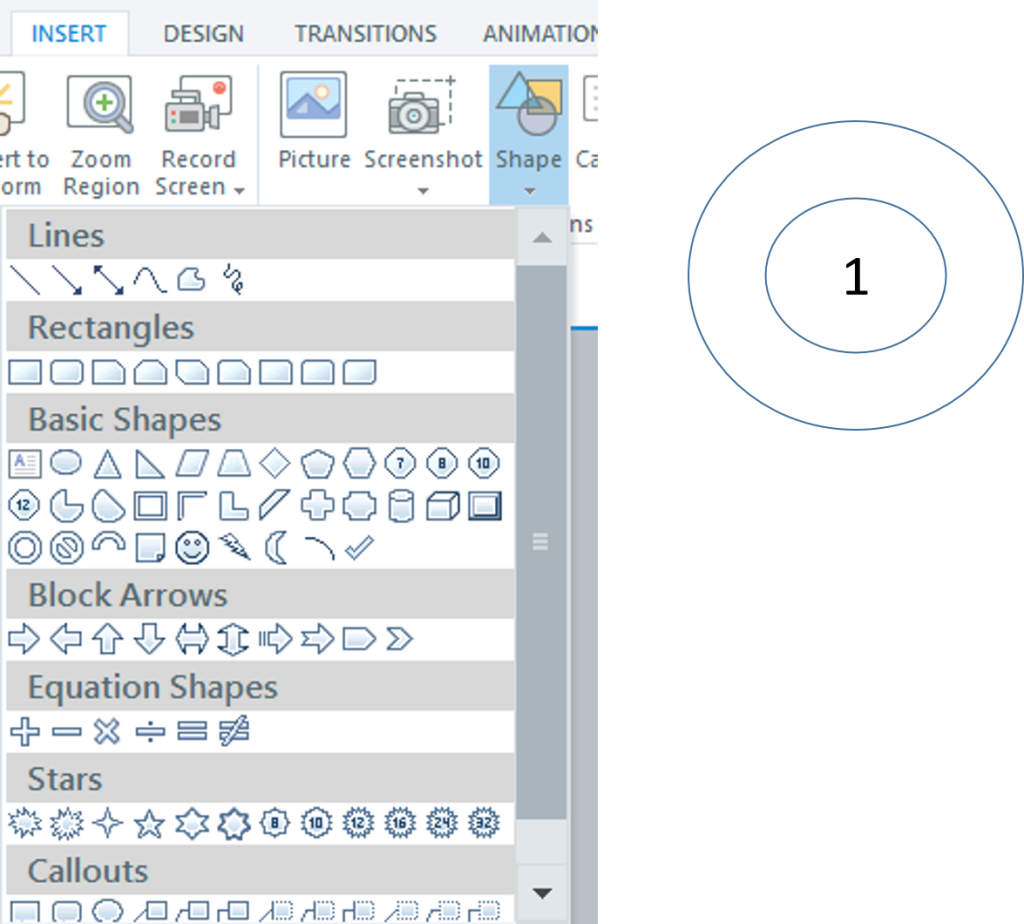
STEP 1: Create a Shape and Give it a Number
With Storyline opened, click the Insert tab>Shapes and select your shape of choice. In the example, I use a Donut shape removing the Fill Color.
STEP2: Add Formatting and Animation to Shape
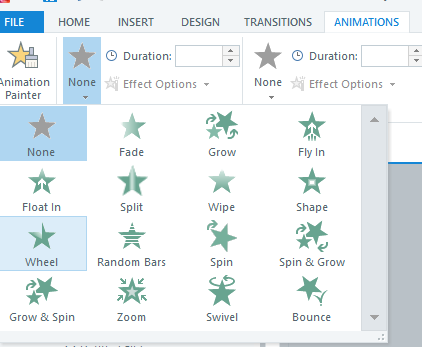
Click on the shape and type the desired number it will represent i.e 1 and let’s add a wheel animation to it. While having the shape selected click on Animation tab>Click None on Entrance Animations and select Wheel.
STEP3: Duplicate Shape and Adjust Formatting
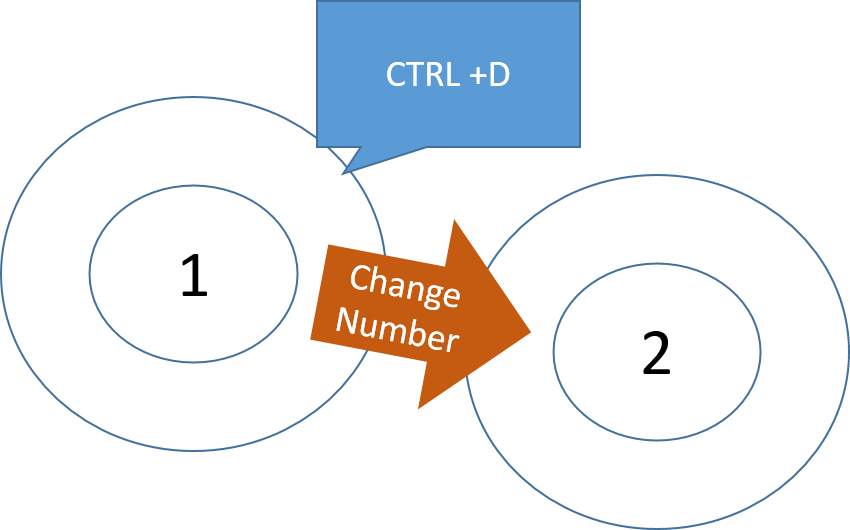
Select the shape, hold the CTRL + D keys to duplicate it, change the number on the new shape to the next number in sequence. You would do this with every new shape to match your desired timer limit. In this example, we are going with “10”.
STEP4: Arrange and Align Shapes
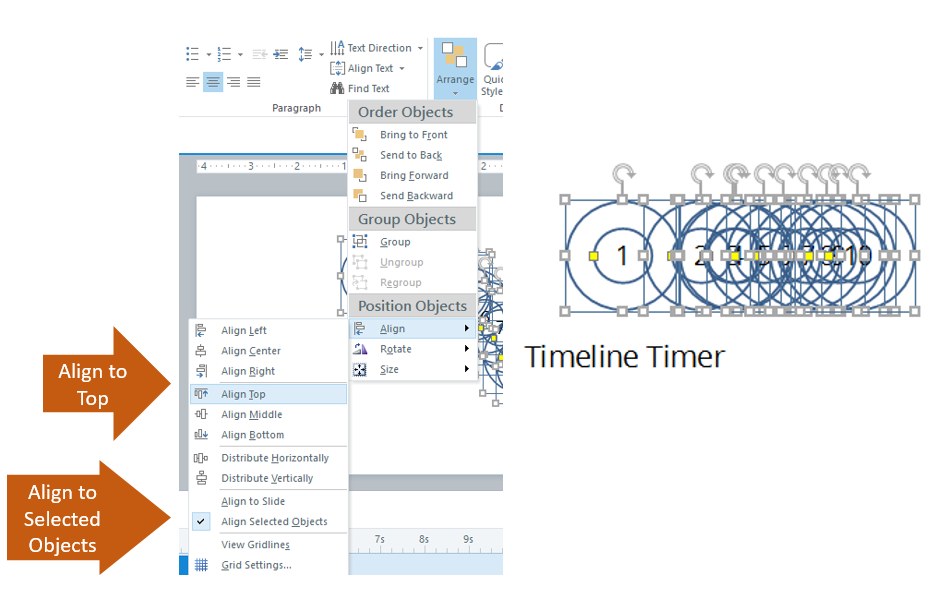
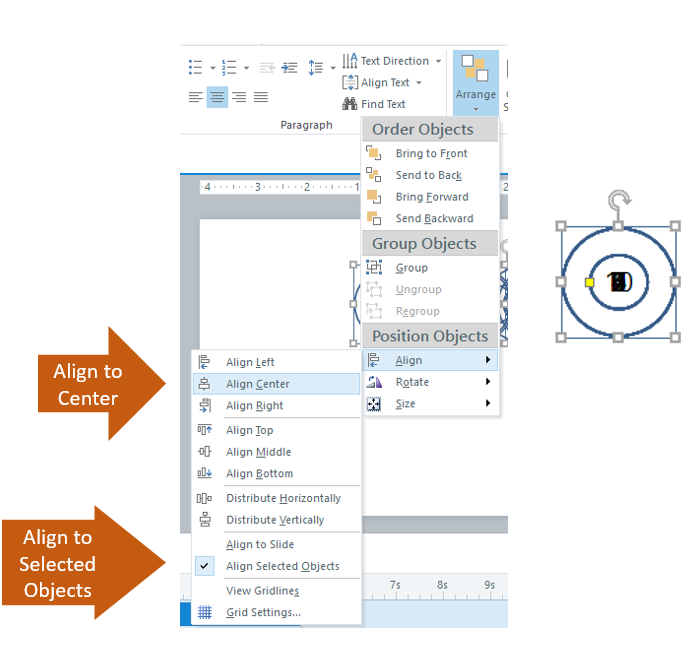
Preferably you would cycle between Step 3 and this step as you create your shapes. In this step you are arranging all shapes on screen and timeline to overlay on each other. To do this, select all the timer shapes on the timeline (click one, hold shift key and click the rest), then select HOME tab>Arrange>Align to Top.
Then, without deselecting the shapes, arrange them to align to center.
STEP5: Arrange the Timeline Sequence
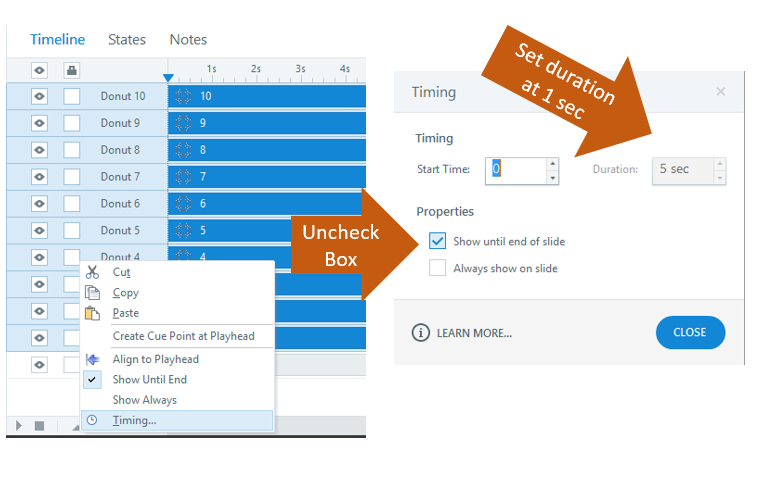
At this point all we need to do is select all timer shapes (see Step4)>Right Click on Timeline>Select Timing>Uncheck default box to “Show until end of slide”>Set duration at 1 second.
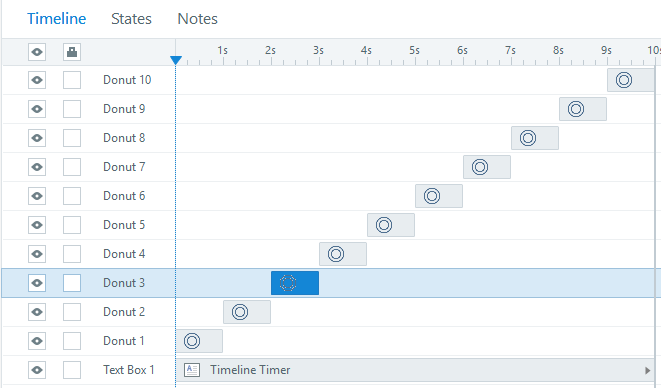
The final touch is clicking an dragging each timer shape on the timeline to look like the screenshot below.
Creative Timers: Enter Variables, Layers and Animation Paths
WARNING! The following commentary might give you nightmares if Math was not your “thing” growing up. There are more creative and functional ways of creating timers in Storyline and they involved layers, variables, animation paths as well as shapes. All the following methods would use a variable named “Timer”.
Layer Loop
The layer loop is achieve by creating an empty one second layer with a “Show this layer when the timeline ends on [one second] layer”. This creates a one second loop on the layer and a trigger to adjust the timer variable every time the timeline ends on the layer. Of course the last touch on this approach is to set a trigger that shows the “One Second” layer at the start of the slide. ***This works great with SL1 and can be sketchy on SL2 in my experience***
OFF-Stage Animation Path
This is my favorite approach which I got from Michael Hinze. Set up a shape off the stage with an animation path and two triggers: The default triggers moves the shape with the timeline starts and you would have to add another so it moves the shape right after it has just completed the same animation path, thus creating a non visible loop (see the Triggers screenshot below). Then, you would just create triggers to adjust the TIMER variable each time the shape completes the animation path. KEY TIP: Animation paths in Storyline come with a 2 second default duration, so change that to 1 second.
Other approaches include using a silent soundbite that’s one second long on a layer, but by now I trust you get the picture. Either try the basic timeline approach or go with off stage animation paths to get your timer going.

