Cascading Style Sheets or CSS is the language used to control the layout and look of web pages. CSS is an essential tool for web design because it makes formatting across multiple webpages really easy. As a learning professional, you would need to know CSS if you want to design your own custom eLearning or web based content. Since all eLearning tools use HTML, CSS and JS, having a strong familiarity with these languages will allow you to also modify any part of an eLearning course as needed. CSS it’s about the “look of things” in the web so, this post builds upon the knowledge shared here previously on HTML5. If you take a few minutes, you will leave this post with some basic but practical experience of formatting a web page with CSS.
CSS tools for the job
I highly recommend that you get a copy of Brackets which is a pretty awesome FREE text editor specifically design for web development. Here are the steps to follow to get you ready to CSS with StyleLearn!
- If you haven’t, read the previous post and follow the steps there.
- Get Brackets or open any of the text editors mentioned on the HTML post.
- Open the text editor you chose, however, keep in mind I’m using Brackets ; )
- Type the following in the text editor without the quotes ” body { background-color: blue; color: white; }”
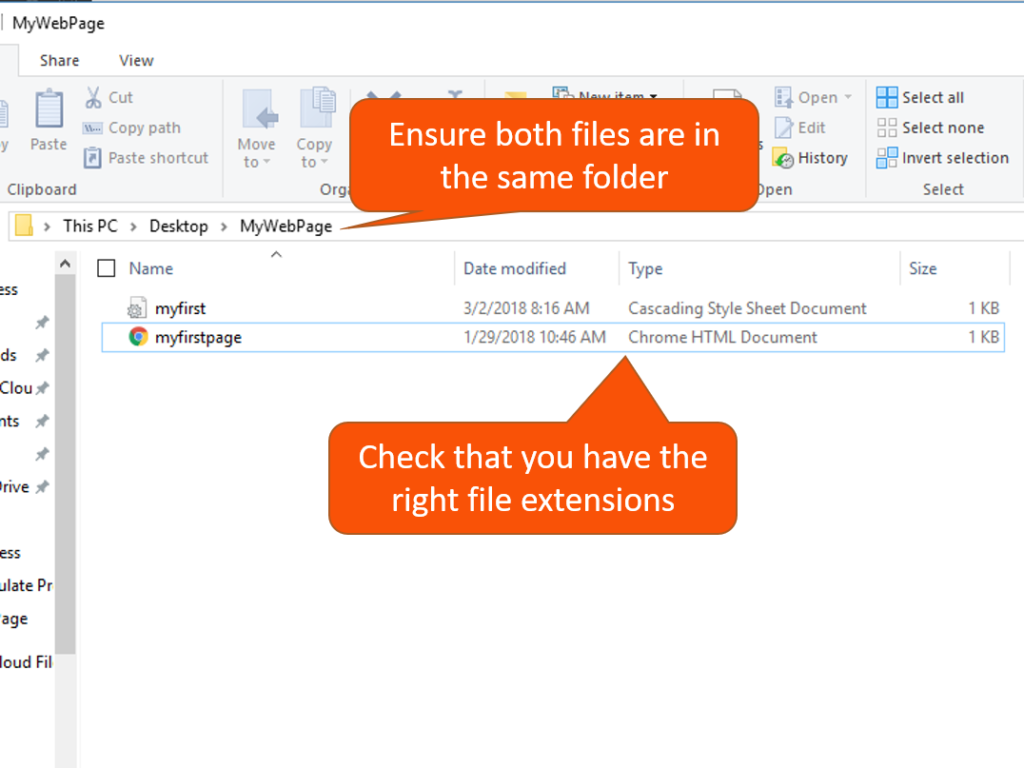
- Save the document as myfirst.css within the MyWebPage folder.
Formatting with a CSS file
So far we have created an independent CSS document, the reason why we save it in the same folder as our HTML5 document is to make it easier when we link them later. This is not a hard requirement but, we are doing it like this at the basic level. Here’s how things should look by now:

Ready to “link or associate” or pretty much tell web browsers where our web page should get its formatting from? Awesome! Let’s do this!
- Click File>Open in the text editor and open the myfirstpage.html Since we are opening the file with the text editor, it should open in edit mode so we can code.
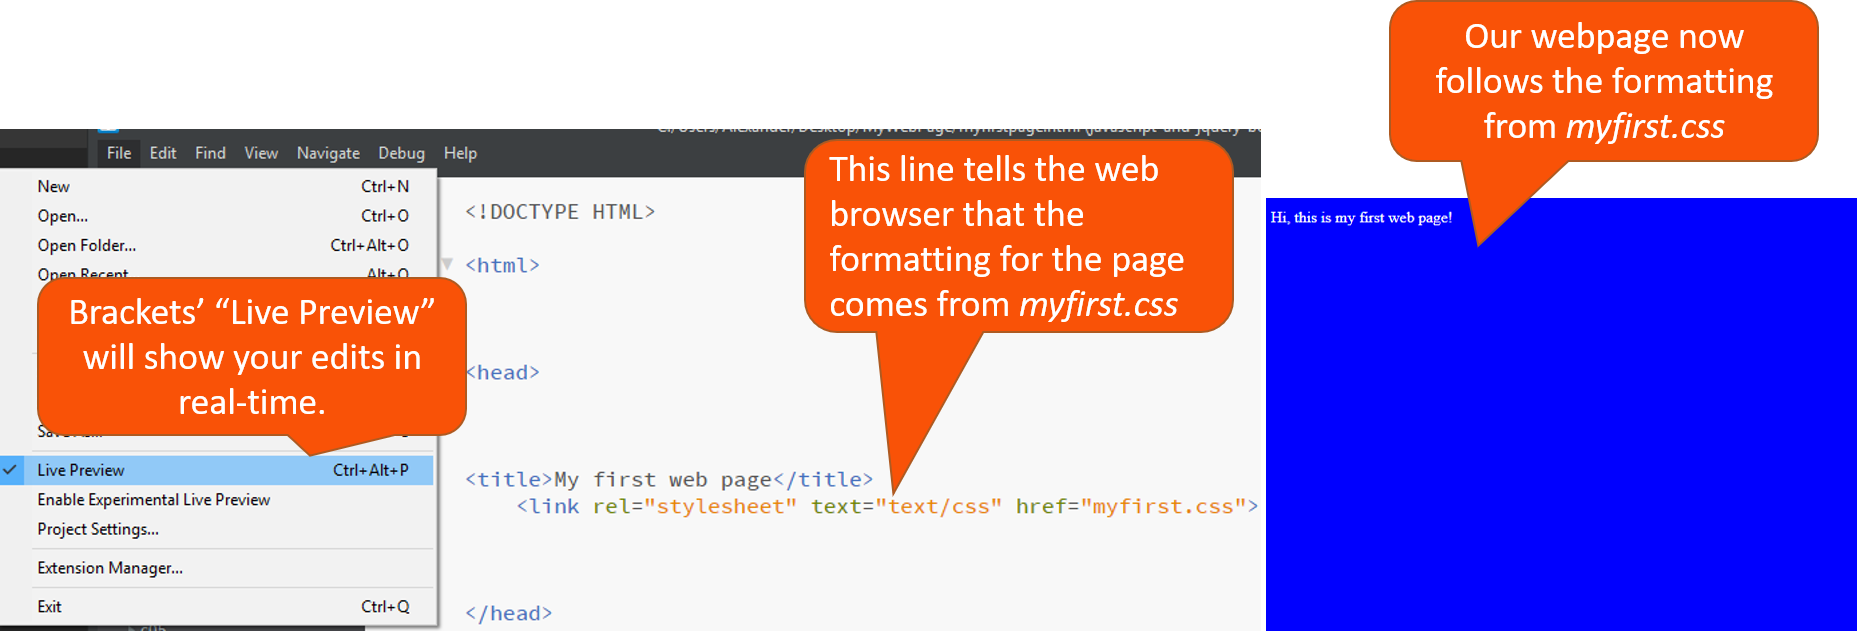
- Find space between the <head> and </head> tags and type this <link rel=”stylesheet” text=”text/css” href=”myfirst.css”> then press CTRL + S to save your edit
- If you have Brackets go to File>Live Preview to see your code in action, if not, then go to the MyWebPage folder and double-click the HTML file to open it on your browser.
Everything should look like the image below, if not, retrace your steps ; )

Want to make things a bit more interesting?
Now that we are getting “dangerous” with HTML and CSS, let’s get creative by adding an image background and controlling the font.
- Edit the HTML file again and this time add Heading 1 or <h1></h1> tags within the <body></body> tags and save it.
- Edit the CSS file and type the following line right before the closing bracket of the “body” brackets: font-family: helvetica, sans-serif;
- Now replace background-color: blue; with background-image: URL(“name of image file”);
You can select any image you would like for Step 3 but, it must be saved within the same MyWebPage folder and the name within the quotes must match exactly the name of the file. For example; “laptop.jpg” it’s not the same as “Laptop.jpg”. This is why it’s important to name all files in lower case, this would eliminate any confusion when associating other web elements. Finally, always remember to save the file first before previewing because otherwise, you won’t see the changes reflected. Now your web page should look like the image below! Great job if it does, check your steps again if it doesn’t (or I may have messed up here ; )

Wrap up and next steps
At this point, we have created an stand-alone CSS file and linked it to our HTML file. Now any formatting changes applied to the CSS will be adopted by the web page. Next week we will add JavaScript language for interaction and add a video. In the meantime, check out W3Schools tutorial pages for HTML and CSS. Secondly, make a copy of your HTML file and you will notice that the two pages are being formatted by one CSS file. Lastly, download the finished work files for this project so you can experiment as well.

